Camera Passthrough EXPERIMENTAL QUEST BROWSER
This section reflects my own research and experiments. Camera Passthrough in Quest Browser currently has incomplete support: there is no direct access to raw camera frames or camera intrinsics.
Camera Passthrough refers to the ability to access the device’s camera passthrough feed in order to blend real-world imagery with rendered content in XR environments or to capture visual input for processing.
Access the camera feed
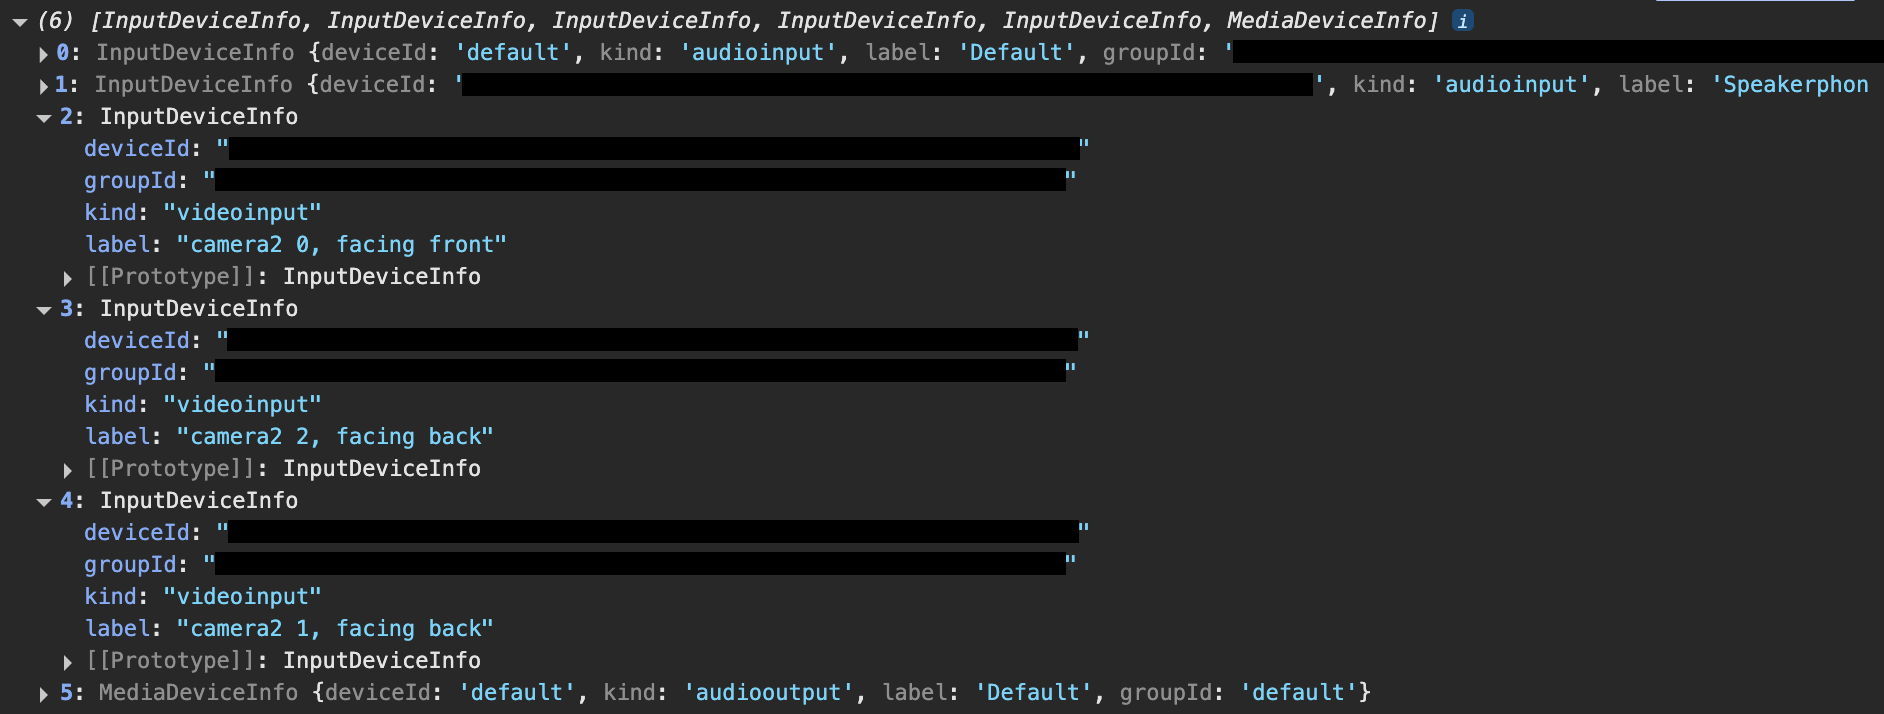
The camera feeds are exposed by navigator.getUserMedia, targeting the specific devices you want to get the stream from. By calling navigator.mediaDevices.enumerateDevices, you can list all the available devices included the cameras. The output is similar to:

Here’s an overview of the devices:
camera 2 0, facing front→ selfie cameracamera 2 2, facing back→ right external camera (used in the sandbox)camera 2 1, facing back→ left external camera
Once you have the stream, you can pass it to a machine learning model—e.g., TensorFlow’s COCO-SSD, which is the model used in this example—to obtain bounding boxes for detected objects.
Display detection results
There are two main ways to visualize these bounding boxes:
2D overlay (no depth)
You can map the detection results onto a fullscreen AdvancedDynamicTexture and draw bounding boxes (e.g., GUI.Rectangle). Because we don’t have exact camera intrinsics or lens distortion parameters, the mapping is approximate. You’ll likely need to apply manual offsets for proportions to look reasonable.
3D meshes (with depth)
A better approach is to render the detected objects as 3D meshes in the scene, with depth and anchoring support.
Depth Sensing
Depth sensing is a working feature, but in practice, getDepthInMeters is exposed only on the CPU path. The Quest 3 mainly supports GPU-based depth, so performance or compatibility may be limited in the browser.
Hit Test
As a fallback, you can use WebXR’s hit test API to get real 3D positions of detected objects. Ideally, you would want to enable hit tests against meshes, not just planes. You can do it in this way:
const xtTest = featuresManager.enableFeature(WebXRHitTest, 'latest', {
    entityTypes: ['mesh', 'plane']
} as IWebXRHitTestOptions) as WebXRHitTest;
unfortunately, this isn’t supported yet. You’ll get:
Failed to execute 'requestHitTestSource' on 'XRSession': Failed to read the 'entityTypes' property from 'XRHitTestOptionsInit': The provided value 'mesh' is not a valid enum valueIn the following example, detected objects are outlined with a bounding box and display a label above. The entire UI is rendered as a 2D overlay.

Video captured with Oculus Quest 3.